Showing posts with label blog hop. Show all posts

Friday, October 19, 2018

Shaking into Fall with Pretty Pink Posh & Glue Dots

A very big crafty hello and welcome to our very special blog hop collaboration with Pretty Pink Posh and Glue Dots!

We are going to bring you a fun blog hop where there are PRIZES from both companies up for grabs, along with inspiration and videos. The crafters involved in this hop are going to bring you an array of projects, coloring inspiration and a variety of ways to have fun with both Pretty Pink Posh & Glue Dots collectively.

We have a super talented line up ahead.... 

Danielle (you're here)
Alix 
Suzy 

Let's check out the quick fall-themed shaker tag I made with Glue Dots and Pretty Pink Posh sequins:


FALL SHAKER CARD

Time: 20 minutes
Level: Beginner
Size: 2 x 4 inches


Materials:

Pretty Pink Posh sequins (nature mix)
Tag with window
Cardstock (orange)
Ribbon (brown)
Sticker/chipboard with phrase

Tools:

Glue Lines Glue Dots®
Sharpie marker (black)
Paper trimmer
Scissors

Directions:

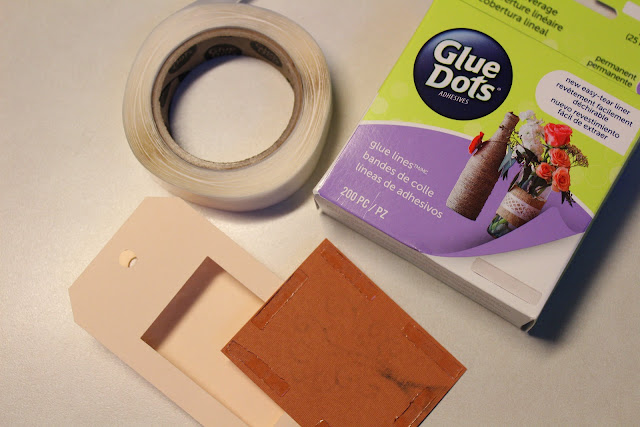
1. Cut cardstock to fit inside tag and use marker to draw a tree trunk with branches.

2. Use Glue Lines Glue Dots® to adhere cardstock to inside of tag.


3. Apply Glue Lines Glue Dots® to the inside edges of tag and add sequins. 


4. Close tag together to seal in sequins.

5. Use Glue Lines Glue Dots® to attach phrase to front of tag.

6. Tie ribbon to tag.


And you're done!


Next stop is Caly!

Friday, September 21, 2018

Hello Beautiful... It's a Blog Hop with Pink & Main and Glue Dots


Welcome Blog Hoppers! Hope you're enjoying the Glue Dots and Pink & Main Blog Hop. If you're just starting out, check out the full list of participating blogs at the bottom of this post.


HELLO BEAUTIFUL CARD

Time: 2 hours
Level: Advanced
Size: 5 x 7 inches

See how you can mix patterned paper, stamped designs, and some bling to make a beautiful card to give to a beautiful friend. And there's a bonus...this card is scented!


Materials:
5 x 7" blank card (ivory)
Cardstock (brown)
Patterned paper (floral, cheetah, ivory, turquoise)
8" Faux suede scalloped ribbon (ivory)
Assorted bling (one flat back button, two loop back buttons, 15 small gemstones)
Tissue

Tools:
Glue Dots® Glue Lines
Pop Up Glue Dots®
Micro Glue Dots®
Craft Glue Dots®
Pink & Main stamp sets (Vertical Greetings, Grandma's Lace)
StazOn ink (black)
Paper trimmer
Scissors
Needle & thread
Perfume or body spray

Directions:

1.Cut paper and cardstock: (1) cheetah print 4 1/2 x 6 1/2", (1) brown 4 x 6", (1) floral print 1 x 5 1/2", (1) turquoise 2 1/2 x 7", (4) turquoise 3 x 3", (3) ivory 2 x 2", (1) ivory 3 1/2 x 3 1/2".

2. Use black ink to stamp the "Hello Beautiful" greeting onto the right side of the 2 1/2 x 7" turquoise paper. 


3. Create lace designs (mini, small, medium, large) with black ink and stamps onto the ivory paper and the 3 x 3" turquoise pieces of paper. Let dry and cut out designs.

4. Cut three 2" circles from tissue, spray perfume onto circles, and let dry.


5. Use Glue Dots® Glue Lines to attach cheetah paper to front of card, followed by brown cardstock, and floral paper.


6. Apply Glue Dots® Glue Lines along left edge of 2 1/2 x 7" turquoise paper and adhere faux suede ribbon. Wrap extra ribbon around to other side of paper and secure with Glue Dots®. Use Glue Dots® Glue Lines to attach paper to front of card.


7. Design one 2 3/4" layered lace embellishment:


Attach flat back button to mini lace design with needle and thread. Add small lace design, along with the three scented tissue circles, and secure  together with thread and Micro Glue Dots®. Use Craft Glue Dots® to attach tissue to medium lace design and then to large lace design. Apply Micro Glue Dots® to small bling gemstones and attach around edges. Secure to card with Pop Up Glue Dots®.


8. Design two 2 1/4" layered lace embellishments:


Use scissors to cut small slits into the center of each leftover lace designs. Adhere Micro Glue Dots® to the back of the mini lace design and push loop back button through center and attach small lace design.


Adhere Craft Glue Dots® to the back of the small lace design and attach medium lace design. Apply Pop Up Glue Dots® to the back of each embellishment and secure to card.


Tip: If you are sending the card in the mail, put card in a small box or padded envelope to avoid damage to card or regular envelope.


Blog Hop Link List: 

Monday, August 27, 2018

Blog Hop with Glue Dots & Whimsy Stamps


Welcome to one of the many stops of the Glue Dots & Whimsy Stamps Blog Hop! It's a week full of inspiration, prizes and fun! Our teams are sharing beautiful projects featuring products from both companies. There are prizes hidden along the hop including a grand prize valued at $100!

To enter into the giveaways, you just need to comment on EACH blog throughout the hop. Then for the grand prize, enter your name and email in the linky tool at the very last stop. Winners will be randomly selected and announced on Monday, September 3rd. Good luck and have fun!


WISH UPON A STAR CARD

Time: 1 hour
Level: Beginner
Size: 4 ¼ x 5 ½ inches

Beginner stamper? No problem! Read on to find out how to create a card using a Whimsy Stamps set, Glue Dots, black ink and a splash of color.


Materials:
4 ¼ x 5 ½” Corrugated card
Cardstock (white, orange)
Crepe paper ribbon (turquoise)
Baker's twine (orange/white)
Small star gems(turquoise)
1 ½” Wood star

Tools:
Glue Dots® Glue Lines
Pop Up Glue Dots®
Micro Glue Dots®
Ultra Thin Glue Dots®
Whimsy Stamps Wish Upon a Star stamp set
StazOn ink (black)
Folk Art dye (marmalade lady)
Paper trimmer
Paint brush

Directions:

1. Use black ink to stamp the quote and star design onto white cardstock. Let dry.

2. Apply two coats of orange dye to star with a paint brush. Let dry in between coats.

3. Trim stamped cardstock to the size of each stamped design and mat onto orange cardstock using Ultra Thin Glue Dots®.


4. Use Glue Dots® Glue Lines to attach quote to inside of card.


5. Gently wrap crepe paper ribbon around the second stamped design and secure to back of mat with Ultra Thin Glue Dots®.

6. Apply painted wood star to design using Ultra Thin Glue Dots®.

7. Wrap baker's twine around design, tie a bow and secure to painted star with a Micro Glue Dot®.

8. Adhere star gems to design with Micro Glue Dots®.


9. Use Pop Up Glue Dots® to attach the finished design to front of card.


And here's the finished card:


Blog Hop Link List: 

Danielle (You're here)

Thursday, July 14, 2011

MemoryWorks & Simple Stories: 100 Days of Summer Blog Hop


WHO: MemoryWorks & YOU!

WHAT: Simple Stories 100 Days of Summer Blog Hop

WHEN: TODAY!! Thursday, July 14, 2011

WHERE: Starts at the MemoryWorks blog and ends at the Simple Stories blog 

WHY: To showcase the summer-themed Simple Stories 100 Days of Summer line
and a chance to win a prize!


Comment on one or ALL the blogs for a chance to win a Simple Stories kit of your very own!! Here's the full list of participants:


Want more MemoryWorks? Check out these related posts:

Thursday, April 28, 2011

MemoryWorks Simple Stories Destinations Blog Hop

Hello fellow blog hop travelers! If you have just joined in, Welcome to the MemoryWorks Simple Stories Destinations Blog Hop! This blog hop is featuring TeamWorks members and our Simple Stories creations with the Destinations line.

Come aboard and travel with us to the MemoryWorks blog and navigate your way to the Simple Stories blog. Leave a comment on any blog and get a chance to win a Destinations kit of your very own! Leave a comment on ALL the blogs, you have a better chance to win! YAY! (Only one comment per blog please.)

My Destinations projects showcase photos from my honeymoon...eleven years ago! These photos have been sitting in photo albums just waiting for a kit like this to appear. I only wish I would have had a travel journal back then to keep track of all our activities and memories.

Let's see what I've done so far with the Destinations kit:

"Hugs & Kisses From Florida" 12x12 Scrapbook Layout
"Ft. Lauderdale" 12x12 Scrapbook Layout
"Mai Kai" 12x12 Scrapbook Layout
"D is for Destination Dan Marino Stalker" 12x12 Scrapbook Layout
Oh yes, we had quite an adventure in Florida during our honeymoon and there will be more layouts to come! I plan to finish my honeymoon scrapbook album during Layout A Day in May and there will be plenty of storytelling.

I also wanted to share a new technique I've been using on my photos. I scrape the photo edges with scissors:


Here's another look at two photos on a completed scrapbook page:


To save paper, I cut out the middle part of a double-sided sheet of cardstock, leaving a one inch thick border. I put the center part aside for later use and used the border for the "Mai Kai" layout and then flipped it over to reveal the other side of the cardstock and made the "D is for Destination Dan Marino Stalker" layout. (Funny story and I'll tell it later in a future blog post.)


Now, it's time to travel back to the start if this was your first destination or go full speed ahead to Sharon's blog. Here's the full itinerary:
    Start here--> MemoryWorks Blog
    Lacey Igo 
    Danielle Hunter <---You are here
    Your next stop---> Sharon Hill 
    Simple Stories <---Your last stop
      Enjoy and good luck!

      Tuesday, April 26, 2011

      MemoryWorks Inspiration & an Upcoming Simple Stories Blog Hop

      WHO: MemoryWorks & YOU!

      WHAT: Simple Stories Destinations Blog Hop

      WHEN: Thursday, April 28, 2011 11AM EST & All Day

      WHERE: Starts at the MemoryWorks blog and ends at the Simple Stories blog 
      with 10 stops in between (including this blog)

      WHY: To showcase the travel-themed Simple Stories Destinations line
      and a chance to win a prize!
       
      I'll be busy today and tomorrow scrapbooking my honeymoon photos from eleven years ago! They've been packed away in photo albums just waiting for the perfect opportunity to be scrapbooked. When I first heard that the new Simple Stories kit was going to be travel-themed, I knew it was time to document my honeymoon stories.

      But before I get scrappin', I wanted to share my latest projects using the April MemoryWorks Express Kit: Whimsy.
       
      Cards:
       
      "You Are 3" Card
      Flower Card
       Mini Cards:

      "Blessing" Card
      "Happy Day" Card
      Layouts:

      "Bouquet" Wedding Layout
      "Sweet Like Sugar" Layout
      Altered Project:

      Decoupaged Storage Container
      Like the scrapbooking and cardmaking products you see? Contact me to join the MemoryWorks Express Scrapbook Kit Club (only 29.95/month, plus shipping and tax). Or download the new MemoryWorks catalog here and place your order here

      See you on Thursday! Thanks for stopping by Snap.Scrap.Blog.Tweet!
       
      Related posts:

      Wednesday, April 13, 2011

      ScrapTiffany Recycled Blog Hop: Gifting With Newsprint

      It's a ScrapTiffany Recycled Blog Hop! If this is your first stop today, you can start at ScrapTiffany and work your way through all the recycled creations by the design team members.

      Before you go, have you ever needed a quick way to wrap a present or just wanted to save money when giving a gift? If your answer is yes, then I have something for you:

      Gifting With Newsprint
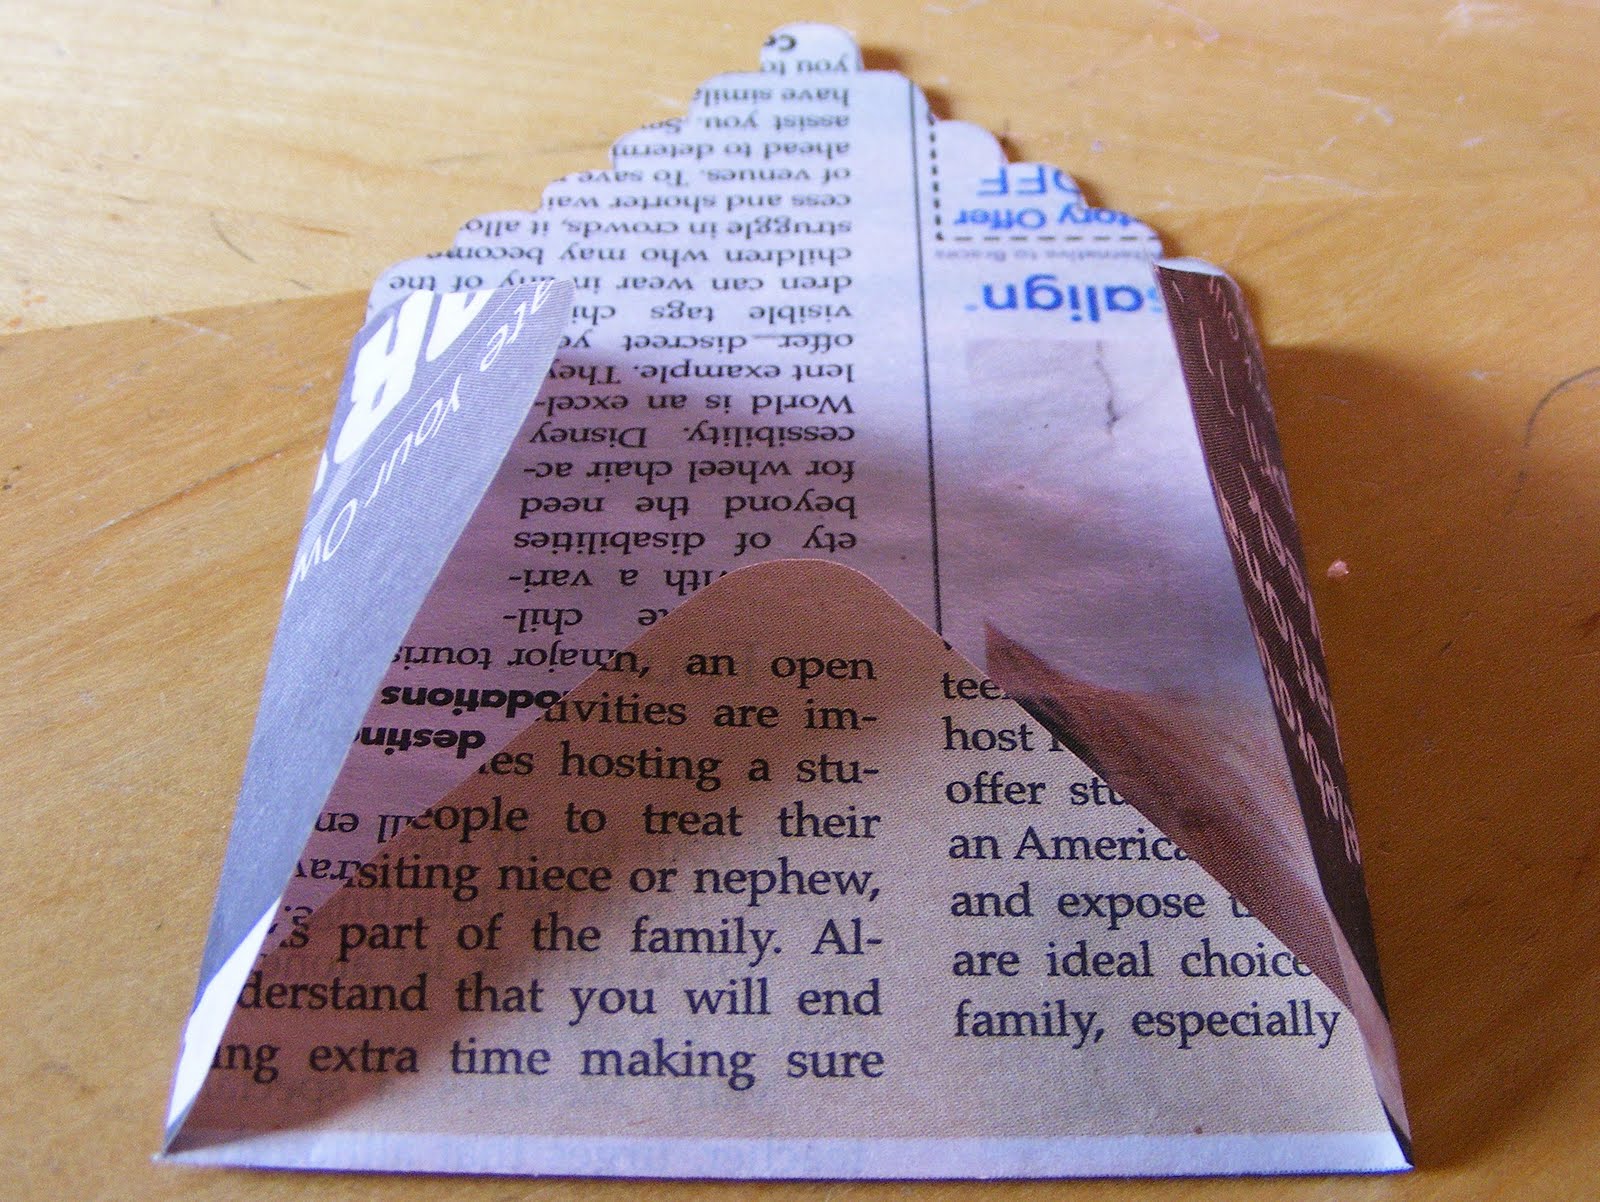
      Covering a box with newspaper is one of the easiest and cheapest ways to wrap a gift, so that's what I did first. Then I used an envelope template and traced the outline onto newspaper.

      Envelope Template

      After cutting it out, I folded the bottom and sides using Glue Dots® to adhere them together.


      I placed a small handmade card inside and used a Removable Glue Dot® to secure the top flap in place.

      Newspaper Envelope


      Newspaper Gift Bow

      (Jessica also has a tutorial on how to make gift bags from newspaper that I plan to try in the future.)

      It's been so nice having you stop by Snap.Scrap.Blog.Tweet, but I must send you on your way to the next stop on the blog hop. 

      Say hello to my crafty friend and Twitter buddy Renee of Charms Buttons & Bows. (Don't forget to visit my other blog, ecoScrapbook, to see how many recycled items I used on one scrapbook layout. I'll also have an extra post on Friday for my next ScrapTiffany Challenge: Stamping.)

      Full list of participants (there will be giveaways too!):

      Start here---> ScrapTiffany
      Kay 
      Bev 
      Danielle <---You are here
      Your next stop---> Renee 
      My other blog---> ecoScrapbook
      ScrapTiffany <---And finish here!

      Disclosure: This blog post was written while participating on the Glue Dots design team.