Thursday, December 30, 2010

My Top 10 Blog Posts of 2010

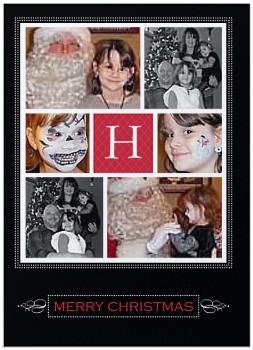
The first scrapbook layout I posted on my blog.
I've been a scrapbook blogger for almost a year now and it's been educational and crazy (the good crazy, not the crazy crazy). I can't even begin to list everything I've learned and all the people who have inspired me during 2010. This blog has helped me create a regular schedule of scrapbooking, crafting and writing - all activities that make me happy. It's also been fun to see what blog posts have brought me the most traffic. See for yourself:

1. Pregnancy Scrapbook Layouts: Documenting 9 Months 
Pregnancy. Nine months that will change your body and life forever. Nine months that go by fast and slow at the same time. Nine months of allowing a little human to grow inside your belly. Read more...

2. Baby Scrapbook Layouts: Journaling to remember your baby's special moments
Babies! They are so cute and cuddly when they aren't stinky. They grow so fast and before you know it, what was once helpless in your arms is now toddling around, eating Cheerios with a dash of dog hair off the floor. So grab your camera and take lots and lots and lots of photos! Read more...

3. Scrapbook Layouts that Celebrate Children
Browsing through any online scrapbook page gallery, you will find an abundance of child-themed layouts. As a parent of two beautiful little girls, I have taken thousands of photos during the eight years I've been a mom and have created hundreds of childhood scrapbook pages. Read more...
 
4. Birthday Scrapbook Layouts & Party Photo Tips
One of my favorite things to do after a birthday party is let my children play with the balloon decorations. They get crazy and have loads of fun while I take dozens of photos. Read more...
 
5. Nail Polish Drive Update: What's in your nail polish?
I'm proud to announce that my daughter has collected approximately 225 nail polish bottles to donate to Chemwise, Inc. Read more...
 
6. The Retweetables: 9 Scrappy Tweets
Why do crafty people have to tweet such good stuff? Tweets like these are why I'm addicted to Twitter Read more...
 
7. Scrapbooking in Ohio and Michigan: 2010 Crops, Retreats, Conventions and More
March 11-14, 2010, Scrapbooking Retreat Weekend, Trout Creek in Harbor Springs, Michigan, $186-237 weekend Read more...
 
8. 2010 Scrapbooking Conventions & Trade Shows
There is a scrapbook convention coming to a city near you Read more...
 
9. Mix a little gore with a few screams, add a dash of sparkle and you have a scrapbook layout
Q: What happens when your child wants to be a serial killer? A: You grab a camera, snap a few photos and create a gorey scrapbook layout. Read more...
 
10. Glue Dots Design Team Announcement: Congrats new Dottesses & Dotties
Just a quick announcement: I'M A GLUE DOTS DOTTESS! I found out a few days ago on Twitter when I saw this tweet Read more... 
 
Thanks for supporting me and my blog in 2010! Hope to see you in 2011! Happy New Year!


Thursday, December 23, 2010

How to Make a Super Fast Mini Scrapbook Album


I don't make as many mini scrapbook albums as I should (and that will change soon since I recently received The Cinch from my Scrapbooker's Christmas Wish List), but I have my own formula for how to make a super fast mini album.

Are you ready for my super simple concoction?

1. Choose paper.
Pick two sheets of coordinating paper for each page layout. One sheet will be for the background and the other will be used as a border.


2. Outline, cut & adhere. Use a pencil to outline the mini album pages onto the paper and use scissors to cut out. Adhere the background paper first and then add the border paper. Repeat the same layout throughout the mini scrapbook album.


3. Mat. Choose one color cardstock (preferably white, black or brown) to mat all the photos and adhere to the album. Leave the mats blank if you are giving the mini album as a gift.


4. Decorate. Grab your ribbon, diecuts and stickers to embellish the pages as you leave room for journaling.


5. Add strips, boxes & tags. Make strips of paper or add word boxes and tags for journaling.


Simple. Fast. Fun.

Tips:
  • Punch holes if necessary for the ring binder before adhering the paper to the page.
  • Some mini albums will not withstand any additional dimension within the pages and will not open or close properly. You may need to stay away from things like thick ribbon and adhesive spacers.
  • Do not use any repositional adhesive for mini albums unless you want the album to fall apart. I prefer to use Glue Dots® since they keep anything in place (and I'm not just saying that because I'm on the Glue Dots Design Team). Memory Book Glue Dots® and the Memory Glue Dots® Dot N' Go are both great adhesives for mini albums. 
  • Remember to stay close to the paper edges when adding adhesive so fingers will not rip the paper when turning the pages.
    This is the same formula I followed to make the mini scrapbook album at the top of this post and the one below:


    Happy Holidays! Enjoy the weekend!! Thanks for stopping by Snap.Scrap.Blog.Tweet!

    You may also be interested in:


    Thursday, December 16, 2010

    How did I get 28 photos onto one scrapbook page?


    Inspiration struck when a scrapbooking challenge was presented to me by If It's Groovy. The goal was to create a scrapbook page using the dictionary, which turned into an unexpected twist: 28 photos on one 12x12 traditional scrapbook layout (not part of the challenge, which was also supposed to include a word that we didn't know, but I seemed to forget that little tidbit, although I did find out that the word "zoo" wasn't used until 1847...does that count?).

    So, how did I get 28 photos onto one scrapbook page? Two words: photo collages. Printing little 4x6 photo collages not only saves money, but are also perfect for all those not so good quality cell phone camera pics. I may not always have my digital camera on hand, but I always carry my Blackberry and have created several scrapbook layouts using the photos I've taken from it. Here's a couple of them:

    Riding around in a golf cart.
    The large sketch-like photo was taken from my Blackberry and edited in Picasa.
    Thanks for stopping by Snap.Scrap.Blog.Tweet! Visit next week when I share a couple mini scrapbook albums that I created as birthday and Christmas gifts.

    Posted by Picasa

    Tuesday, December 14, 2010

    Happy Holidays

    Family Wall Noir Christmas 5x7 folded card
    Create beautiful photo Christmas cards at Shutterfly.com.
    View the entire collection of cards.

    Friday, December 10, 2010

    Wedding Favor Idea Using the Kanji Symbol for Love

    "Love and marriage go together
    like a horse and carriage." 
    -Sung by Frank Sinatra

     Kanji Love Symbol Wedding Favor Box
    Instead of spending tons of money on wedding favors from a store, you can create your own custom-made wedding favor boxes using the kanji symbol for love.

    Supplies:

    • Small wood box with window
    • Glue Dots®: Micro, Continuous Line
    • White paint
    • Black acrylic jewels
    • Black ribbon
    • Black marker*
    • White paper
    • Paper Trimmer
    *I chose to write love in Japanese kanji using a marker, but you can also purchase a kanji love stamp or use kanji font in a word application and print.

    Instructions are for one wedding favor box.

    1. Paint the box. Let dry and apply a second coat.

    2. Cut a square to fit into the window of the box and write the kanji love symbol with black marker onto the paper. (Tip: Lightly write the symbol with pencil first before using the marker.) Once the box is dry, place the square into the window.

    3. Adhere the acrylic jewels around the window on top of the box and on the closure with Micro Glue Dots®.

    4. Wrap a Continuous Glue Line® around the box and attach the ribbon.

    There you have it! A beautiful black and white wedding favor box showcasing the kanji symbol for love.

    Thanks for stopping by Snap.Scrap.Blog.Tweet!

    You may also be interested in:
    Disclosure: I wrote this post while participating on the Glue Dots design team.

    Posted by Picasa

    Thursday, December 9, 2010

    The Winner of the MemoryWorks Scrapbook Kit is...

    Lisa!!!

    Please email me, scrappindanielle (at) gmail (dot) com, with your contact information.

    I just wanted to say thanks to everyone who helped me celebrate 100 blog posts by commenting and tweeting. This has been a very exciting week (even though I'm sick with a cold). 2011 looks to be even more exciting as I continue on my journey of self-discovery through crafting, scrapping and blogging. 

    Be sure to stop by tomorrow for a new Glue Dots project, a wedding favor box with the kanji symbol for love (which so happens to be my first kanji tattoo).

    Winner was chosen using Random.org

    Tuesday, December 7, 2010

    100th Blog Post Celebration, an Announcement + Giveaway

    celebrate 

    This is my 100th blog post. I started my blog eleven months ago (January 2010) and can't believe I finally made it this far. I never expected 100 posts in less than a year and I'm proud of this accomplishment. Thank you so much for the lovely comments and support this year. I appreciate all of you!

    Over the past eleven months, my blog has grown and changed, continually evolving along with me. I've scrapbooked and crafted more this year than I have in the past due to all the fantastic, inspiring people I've "met" on Twitter (and all the others who I've met by some sort of connection to Twitter). 

    I remember the early days of reading blogs (the first several months of this year) and wanting to be part of a design team. Now, I feel lucky to participate on three teams:

    Glue Dots (Dottess)

    and, drum roll please...
    BIG ANNOUNCEMENT!!

    I want to share the luck, so one fabulous reader will receive a MemoryWorks Simple Stories Life Documented Scrapbook Kit (Value $16.99):


    180 Piece Kit includes: (30) Cut-Apart Double-Sided Cardstock Elements: 12 4x6 Monthly Title & Journaling Cards; 6 4x6 Journaling & Quote Cards; 2 6x8 Photo & Journaling Mats; 3 4x4 Quote Cards; 2 6x12 Page Elements; 1 4x12 Title Strip; 4 2x12 Border Strips ~ (4) 12x12 Double-Sided Cardstock Patterned Paper ~ (6) 4x6 Printed Transparency Photo Overlays ~ (1) 12x12 Alphas & Elements Cardstock Sticker Sheet: 105 Characters; 32 Elements; 3 Borders (Acid-Free/Non-Repositional/Archival-Quality) ~ Free 12x12 Instruction Sheet/Idea Guide ~ Free Downloadable Elements


    WANT TO WIN?

    Visit MemoryWorks, browse the products and leave a comment here with one (or more) items that you like. Check back on Thursday (12/9) to find out if you won.

    Extra entry: TWEET THIS...

    Celebrate 100 blog posts! Win a MemoryWorks Simple Stories Scrapbook Kit!
    Ends 12/8 http://www.scrappinmemories4u.com

    Then leave a comment below with the link to your tweet. Giveaway ends at 11:59PM EST Wednesday, December 8. Winner will be announced on Thursday, December 9. Good luck!

    Thanks for stopping by Snap.Scrap.Blog.Tweet! Don't forget to to visit:

    Monday, December 6, 2010

    How to Make Cupcake Toppers for a Birthday Party

    Birthday Cupcake Toppers
    Will you be hosting a birthday party soon and want to make your own cupcake toppers? You've come to the right place! (If not, you can start thinking about how good one of those chocolate cupcakes would taste. They are two-biters, but it only takes me one big bite.) Now grab your paper scraps and let's get started...

    Supplies:

    • Square punches or paper trimmer
    • Cupcake punch
    • Glue Dots®: Micro, Craft
    • Paper scraps (brown, white, assorted colors)
    • Edge distresser (optional)
    • Ink (optional)
    • Small beads
    • Toothpick
    • String
    Instructions are for 12 cupcake toppers.

    1. Make 12 1 1/8" brown squares (distress edges), 12 1 3/8" assorted color squares and 12 1 3/8" white squares (distress and ink edges).

    2. Place one Craft Glue Dot® in the middle of each assorted color square and attach the toothpicks. Adhere another Craft Glue Dot® in the middle of the white squares and place on top of the assorted color squares. Mat the brown squares to the glued squares with additional Craft Glue Dots®.

    3. Punch 12 assorted color paper cupcakes and adhere to the squares using Micro Glue Dots®.


    4. Add small beads to the top of the paper cupcakes with Micro Glue Dots®.


    5. Tie a bow around each toothpick with string.

    Insert the toothpicks into cupcakes and sing "Happy Birthday!" (to my mother-in-law...her birthday is today!!)

    Thanks for stopping by Snap.Scrap.Blog.Tweet! Visit tomorrow for my 100th Blog Post Celebration, a big announcement and giveaway! 

    You may also be interested in:


    Disclosure: I wrote this blog post while participating on the Glue Dots design team.

    Posted by Picasa

    Wednesday, December 1, 2010

    The Sketchbook Project: 30 Days & 30 Sketches

    One month, 30 days and 30 sketches...I started The Sketchbook Project on the first of November and finished my 30th sketch yesterday. Now, all I need to do is create a cover, introduction pages and possibly add a few more sketches before I send it off for a 2011 tour.

    Take a look at my latest sketches (you'll see I had the holidays on my mind with a couple of them):


    In case you missed my previous Sketchbook Project posts:
    Thanks for stopping by Snap.Scrap.Blog.Tweet!